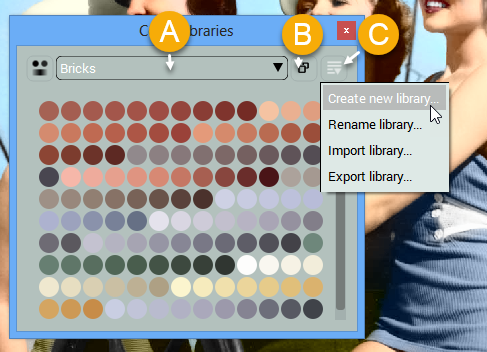
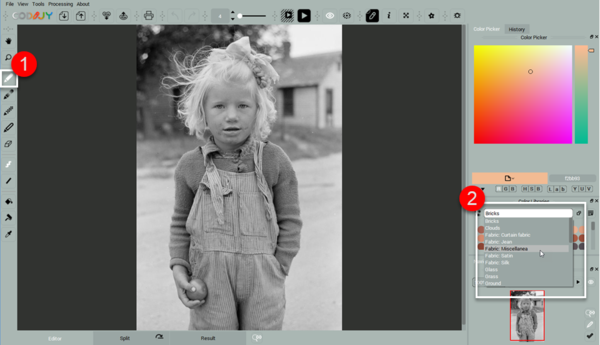
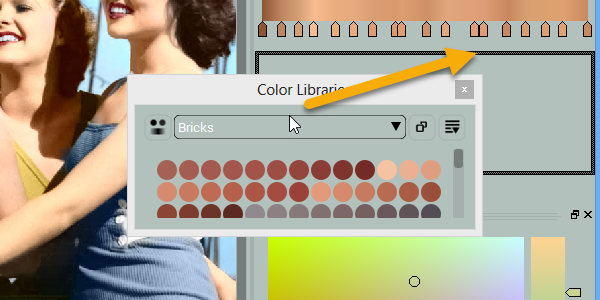
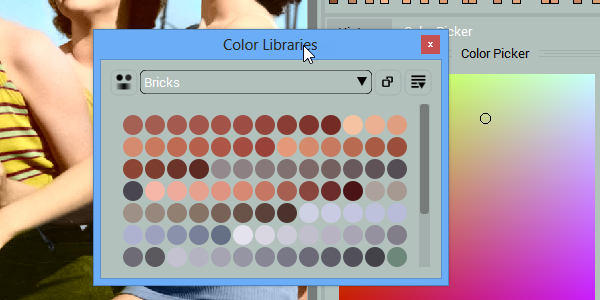
Color Libraries window offers access to ready color sets on 100 popular topics. It lets:
(A) select libraries from the drop down list (B) open selected library to the floating window (C) (Pro Edition Only) create / rename / export / import libraries
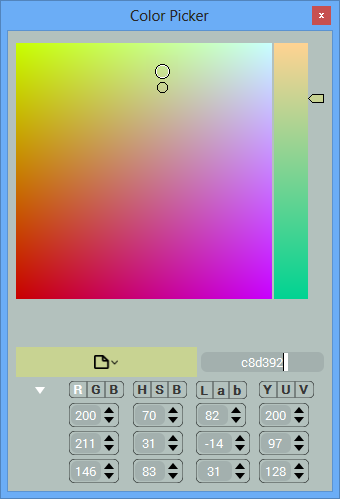
Pick colors (a) using palette, (b) channel by channel, (c) by typing in HEX values. Color Picker works with Pen Tool and Color Picker Tool.
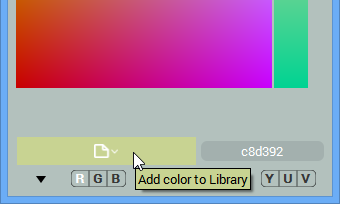
Add colors to libraries
Add selected color to the Library.
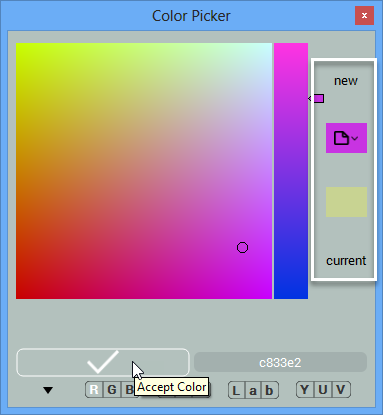
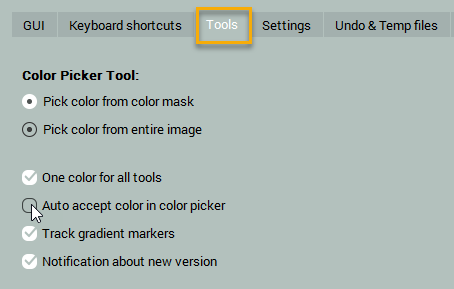
Disable Auto-Accept Colors
By default, the colors you pick get accepted automatically.
When you disable auto-accepting colors, the Color Picker dialog will display both previous and new color. To draw with the new color, you will need to click Accept Color button.
You can disable Auto-Accept Color Mode in Preferences, under the Tools Tab.
The strokes that you draw in order to add, protect or remove colors from the photo arease are also referred to as Masks. There are color, gradient, protection and decoloring masks.
Masks appear in two modes: (a) Normal Mask (b) Transparent Overlay Mask.
When you save you work to CODIJY Document, the masks get saved along. You can export and import masks in the Pro Edition of CODIJY.
Rules of drawing masks
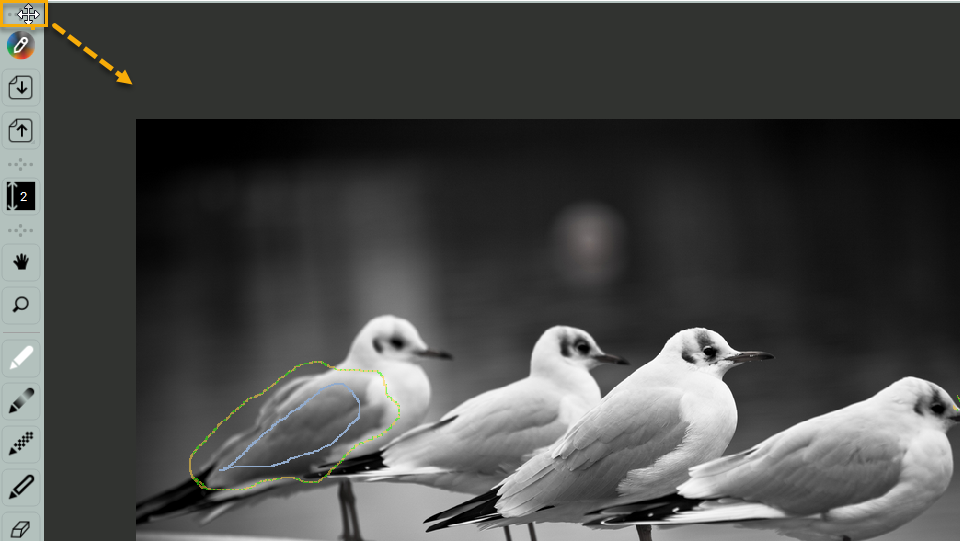
Draw masks close to the border without stepping over it.
CODIJY automatically detects borders between objects, once you provide colors for all neighbouring areas.
Color masks
You can draw color masks with the Pen Tool (P). You can pick colors for color masks from extensive collection of Color Libraries or using Color Picker.
Gradient Masks
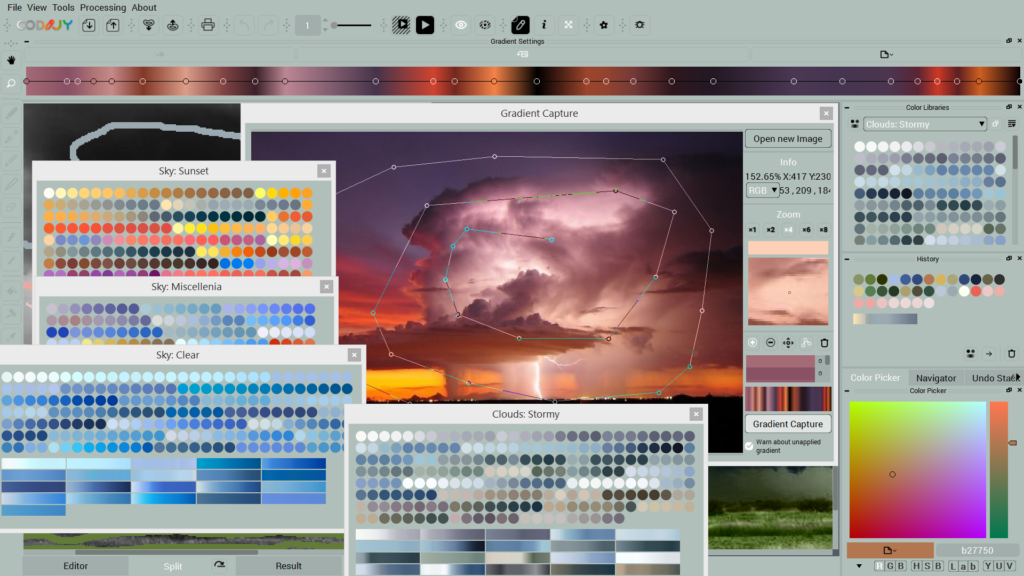
Gradient masks let you add multiple colors and their transitions with a single stroke. Gradients can be helpful when you colorize faces and landscape features.
Enable the Gradient Pen (G) tool to add the gradient mask.
TIP: When you draw the gradient mask, try to draw the stroke over the areas you wish to apply the colors of the gradinet to. If you captured the gradient, follow the route you took in the Gradient Capture Tool and draw the mask over the same area.
Option 1. Pick the Gradient from the Color Libraries (Pro Version) Option 2 Compose and edit in Gradients Settings Dialog Option 3 Capture a Gradient from a color images using Gradient Capture Tool (Pro version)
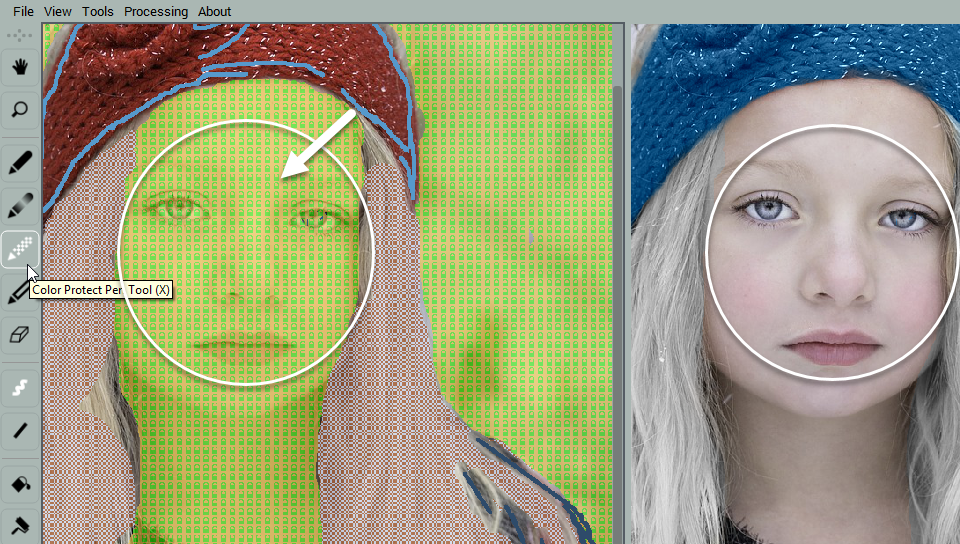
Color Protection Masks
To protect original colors of the area, use protation masks. Draw the protection masks with the Color Protect Pen (X).
TIP: We recommend covering the whole area with the protection masks for the quality protection result. Increase the brush size of the Protection pen, to speed up the drawing of such mask!
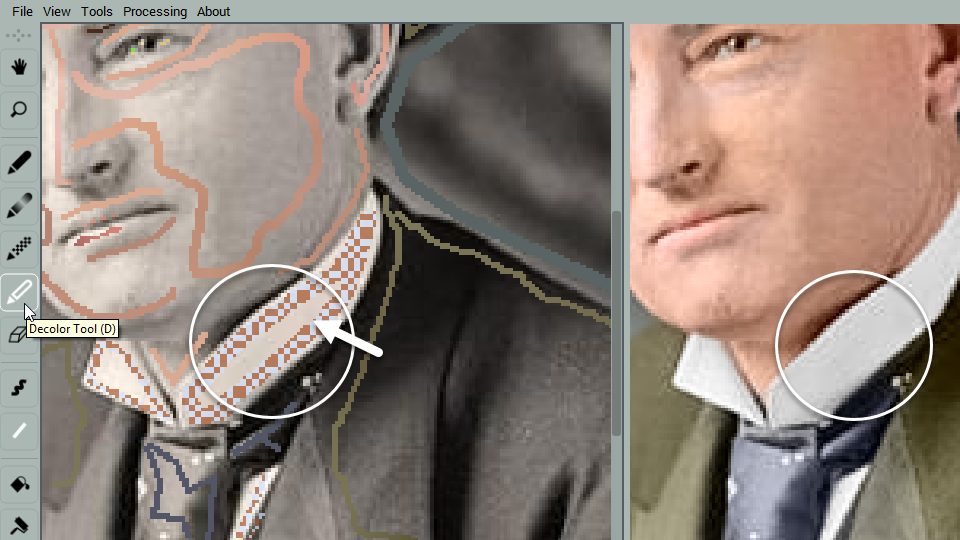
Decoloring Masks
Use De-color pen (D) to draw the decoloring masks when you want to convert or leave some areas to the grayscale.
TIP: Decoloring masks are generally useful with e.g. white clothes, silver or iron parts.
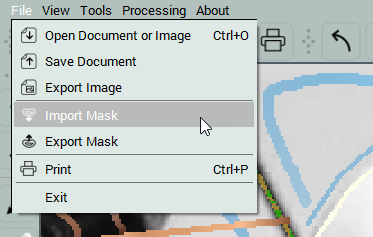
Export/Import Masks
You can export the Masks to the CMSK files and import them for another image using the related toolbar icons or navigating to the related command in the File menu. NOTE: This feature is available in Pro edition only.
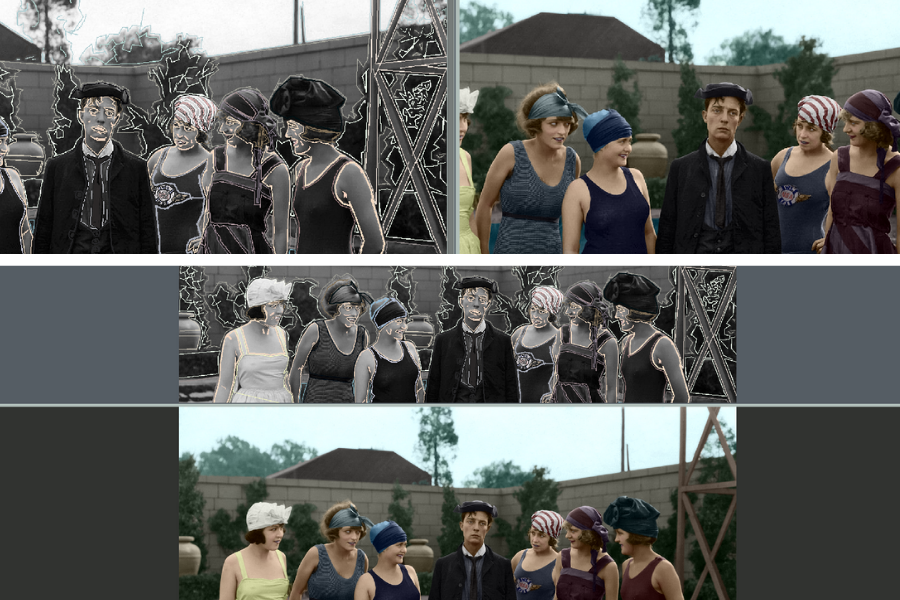
TIP: Export/import saves time when you colorize similar images e.g. movie screens.
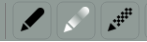
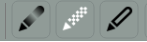
CODIJY drawing toolbox includes four pens: Pen tool, Gradient Pen, Color Protect Pen and Decolor Pen. You can access them from the Tools toolbar or under the Tools menu.
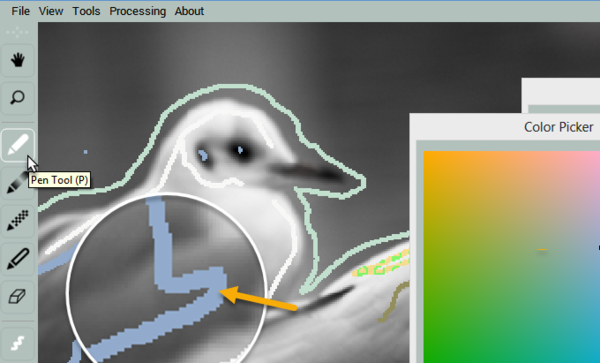
Pen tool
The Pen Tool lets you draw color masks. You can pick colors from the Color Picker, Color Libraries, from color & gradientmasks as well as entire images using the Color Picker tool. Colors are saved to the Color History.
You can enable the Pen Tool using the toolbar icon or (P) shortcut
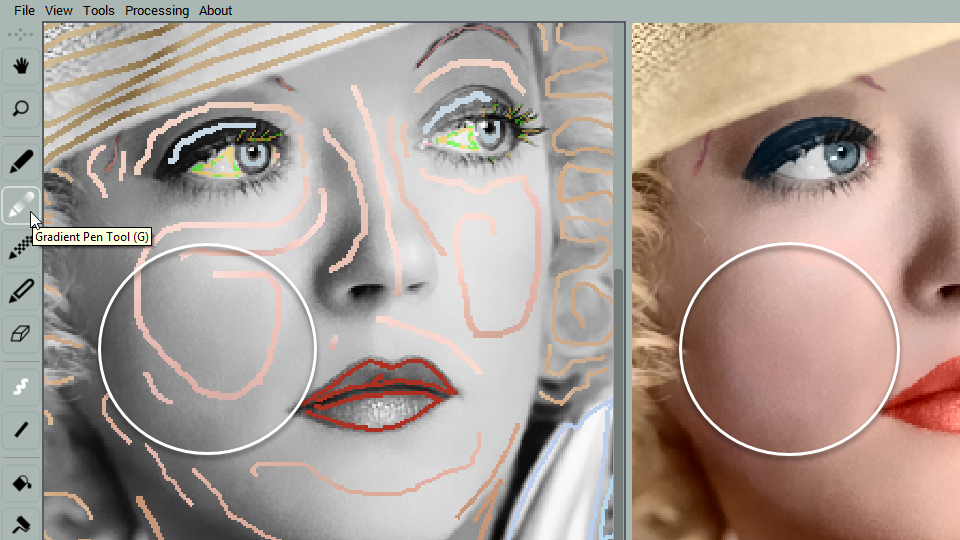
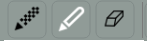
Gradient Pen
Gradient Pen lets apply multiple colors and their transitions with a single stroke. Gradients can be helpful when you colorize faces and landscape features. You can:
Option 1. Pick the Gradient from the Color Libraries (Pro Version) Option 2 Compose and edit in Gradients Settings Dialog Option 3 Capture a Gradient from a color images using Gradient Capture Tool (Pro version)
You can enable Gradient Pen by clicking its icon on the tools toolbar or using (G) shortcut.
Color Protect Pen
This tool protects original colors of the area, while image processing. You can switch to Color Protect Pen using the below icon or (X) shortcut
Tip: Color protection is often used, when you want to protect black and white colors, metals, white shirts, when colorizing black and white images. It’s also needed, when you decided to recolor an object or two on the color photos.
Decolor tool
Decolor pen is used to convert objects and areas to black and white. Even, if your work on an old vintage image, its color scheme may not be in pure grayscale. Some photos turn yellow or brown, thus making objects like metal, white clothes, teeth look pale. Decolor pen lets you get rid from all pale tones.
You can switch to Decolor Pen using the icon or D shortcut
Eraser
The standard Eraser tool lets remove color masks. You can switch to Eraser using the icon or (E) shortcut.
Pen Settings
You can change the brush size and mask mode of all four Pens and the Eraser.
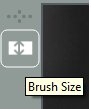
Brush Size
The Brush Size is accessible from the standalone toolbar. Depending on its position. Please note that ir will look divverently in the vertical and horizontal positions.
It’s also available via the Context menu that pops up over the masks when you have any of the four Pens or the Eraser enabled.
You can change the line width by changing the value or adjusting with s scroller. Also you can press “[“ for decreasing brush size and “]” for increasing it.
Line Style
There are two line styles: the straight and freehand lines. You can switch between them using the corresponding toolbar buttons.
Alternatively, press “F” for freehand and “L” for drawing in straight strokes. Use “Space bar” to cut out the line strokes.
Drawing Line masks without releasing the mouse button
You can complete this mask without releasing the mouse button (or raising the pen) with the help of two shortcuts!
Press Spacebar to cut off the line and change direction.
Press and hold Spacebar to switch to Freehand drawing
CODIJY allows you to add, remove and protect photo colors, by drawing simple Masks over photo areas using several Pens.
Add Color masks
NOTE: This is a concise description of colorization process. Please check out our CODIJY Lessons for step by step colorization tutorial.
Most of colorization is done with solid colors. Use Pen Tool to draw color strokes (masks) over different photo areas. Pick colors from Color Libraries or using Color Picker.
CODIJY automatically detects borders between objects, once you provide colors for all neighbouring areas.
TIP: The example file of this coloriztaion with related Color History and masks is packed with CODIJY and can be accessed from the Project Explorer.
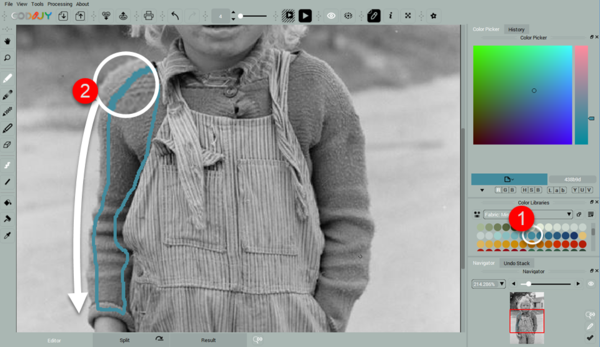
Enable Pen Tool (P). Start with ready colors. Select a Color Library from the drop down list.
Pick a color and draw the mask within the area, close to the border. By default, you will be drawing in Freehand Mode (F).
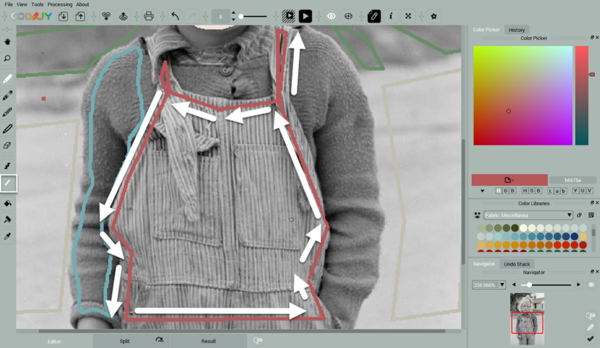
If the area has a regular shape, switch to the LineDrawing (L). Line masks are quicker to draw.
NOTE: Use several shortcuts to draw masks in the Line mode quicker.
Spacebar will cut off lines in Line mode,
Escape button will delete the previous line, when you hold the mouse button down.
Long-press Spacebar to switch to the Freehand mode, without releasing the mouse button.
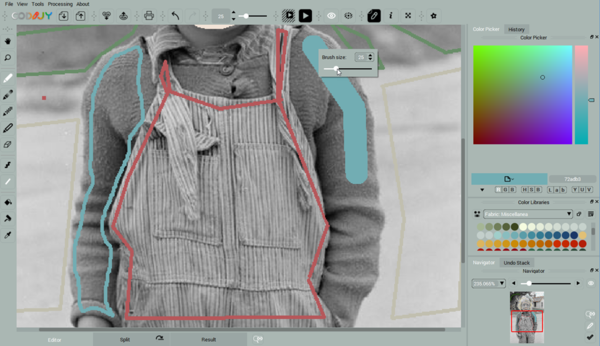
To change brush size, useBrush Size tool on the toolbar or call the Context Menu over the Mask.
You can access previously used colors from the History. NOTE: you can enable History, if it was disabled in your layout.
Generate result preview
Process the image (press Ctrl + R (Win) / Cmd + R (Mac)) or click , when you are done or want to preview the colorized result.
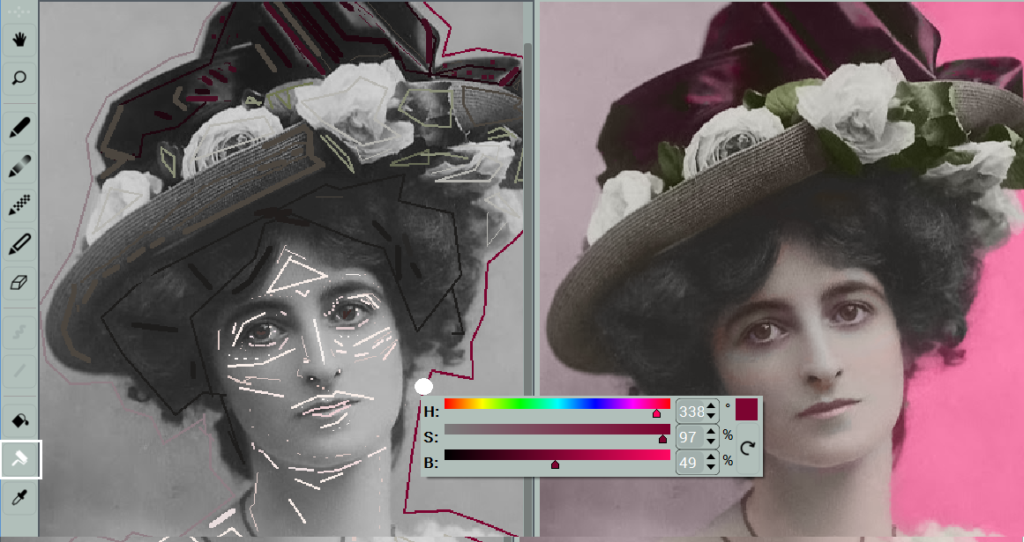
Quickly edit the mask color
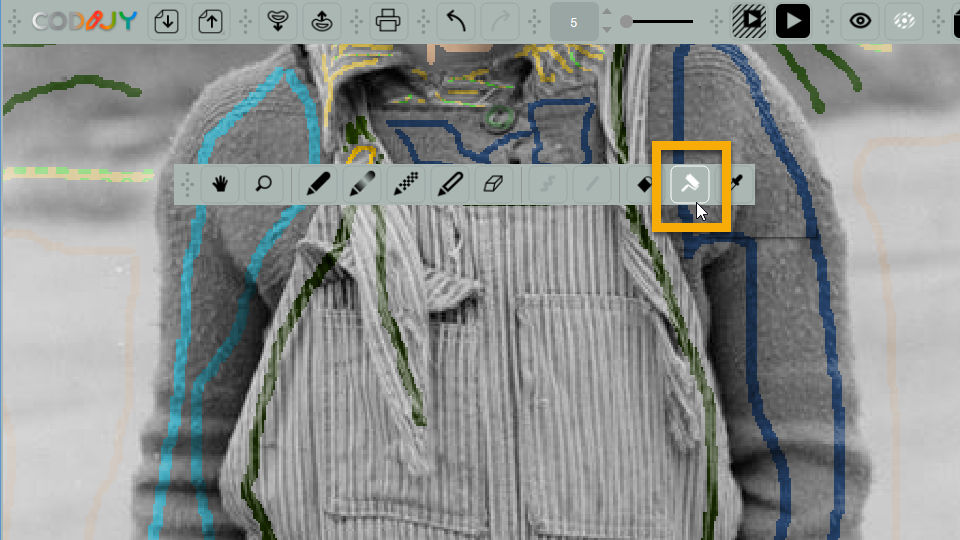
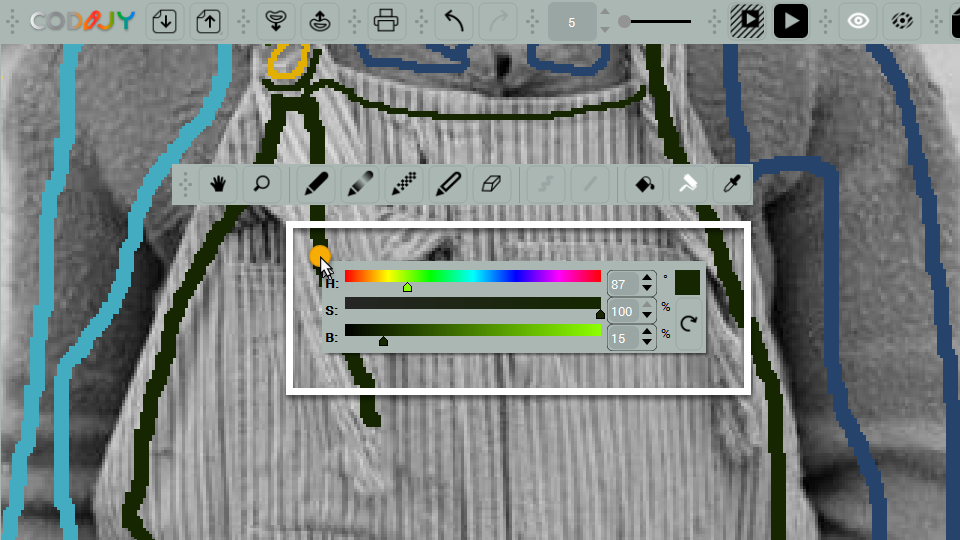
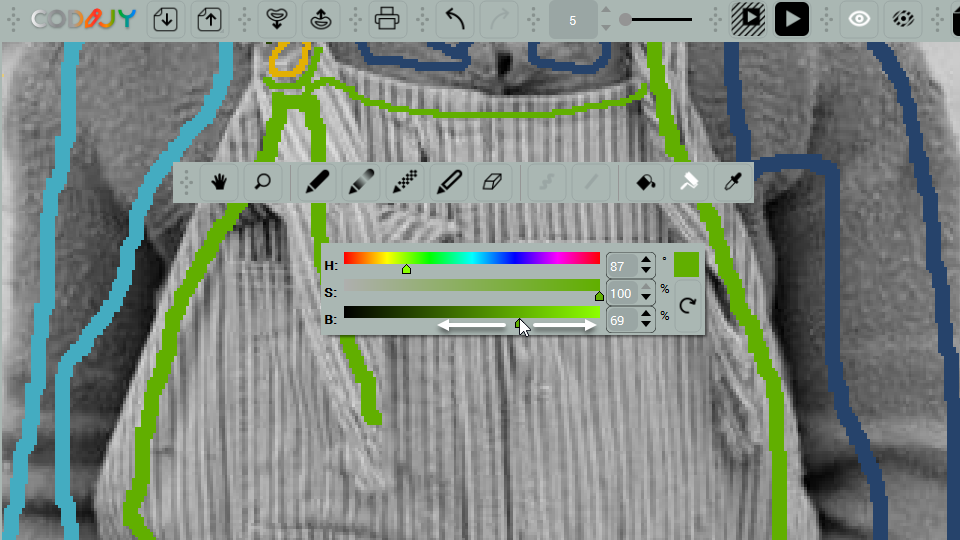
If you want to change the mask color on the spot, adjust it Hue / Saturation / Brightness using the HSB Repaint tool .
Step1. Enable HSB Repaint Tool by pressing (H) or clicking on the toolbar.
Step 2. Click the mask. The HSB dialog will pop up.
Step 3. Adjust Hue/Saturation/Brightness parameters using handles or the digital values. The Mask color will change in the real time. Process the image (Ctrl+R / Command+R) to preview the Result.
Gradient masks let you add multiple colors and their transitions with a single stroke.
To draw a gradient mask:
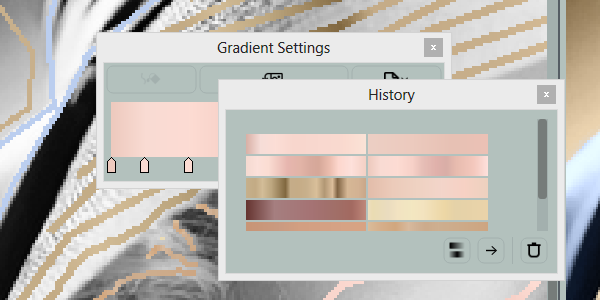
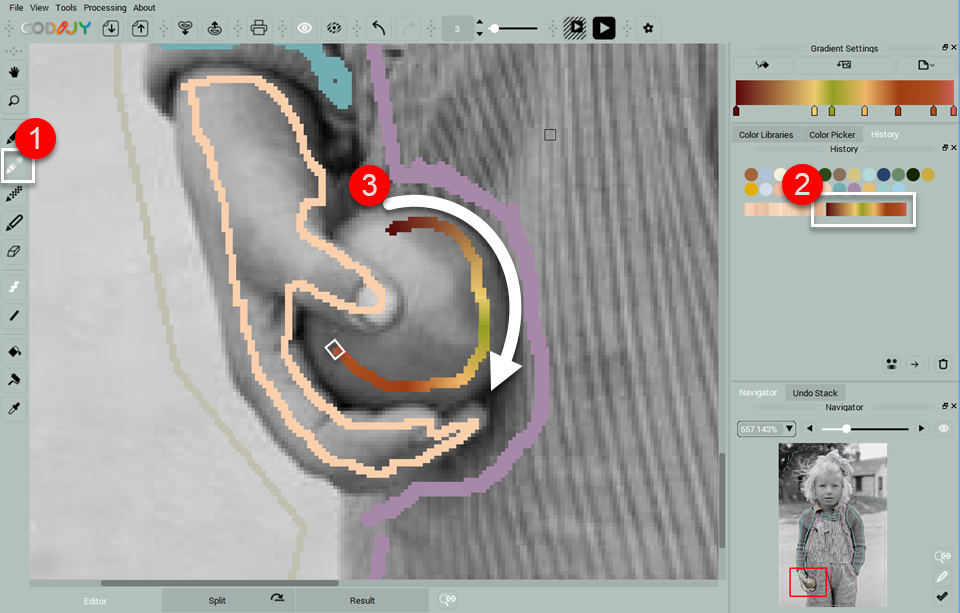
Step 1. Select Gradient Pen tool on toolbar. Step 2. Use ready gradient from the Color Libraries or capture on from a color photo.
NOTE: We are using the gradient saved to the Color History of the example file packed with CODIJY. You can find it among examples in your Project Explorer.
Step 3. Draw the gradient mask trying to match colors of the gradients to the areas that you mean them to applied to.
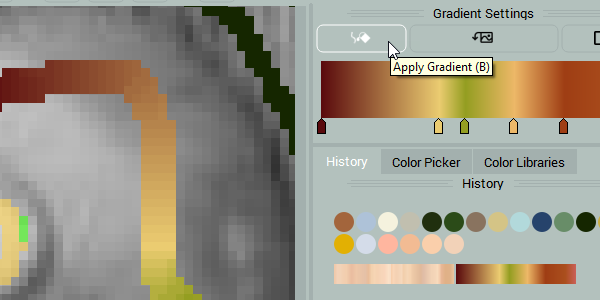
Step 4. Click Apply Gradient in Gradient Settings or simply press (B) after the mask is completed. NOTE: If you don’t apply the current gradient, the newly selected gradient will apply to the last drawn mask.
Process the image ( Ctrl + R (Win) / Cmd + R (Mac)) to generate colorized Preview.
CODIJY supports the variety of file formats including the proprietary file types of CODIJY documents, libraries and masks, along with the popular image formats.
CODIJY File Formats
MGD – is the file format of CODIJY documents. The MGD file stores the image, masks, Color History and Document Information. CODIJY documents can be opened in CODIJY software across all supported platforms.
CML is the format of CODIJY Color Libraries. It allows creating and sharing your own libraries, importing CODIJY libraries created by other users and more.
CMSK is the file format of CODIJY Masks. You can export Masks from one document and export them into another document, e.g. the next screenshot of the same movie scene.
CML and CMSK files are also cross-platform.
Image formats
CODIJY imports the images and allows you to export the Result Preview to the files of the following image formats:
JPG – Joint Photographics Expert Group
JPEG – Joint Photographics Expert Group
PNG – Portable Network Graphics
BMP – Windows Bitmap
PBM – Portable Bitmap
PGM – Portable Graymap
PPM – Portable Pixmap
XBM – X11 Bitmap
XPM – X11 Pixmap
TIF – Tagged Image File Format
TIFF – Tagged Image File Format
WBMP – Wireless Application Protocol Bitmap Format
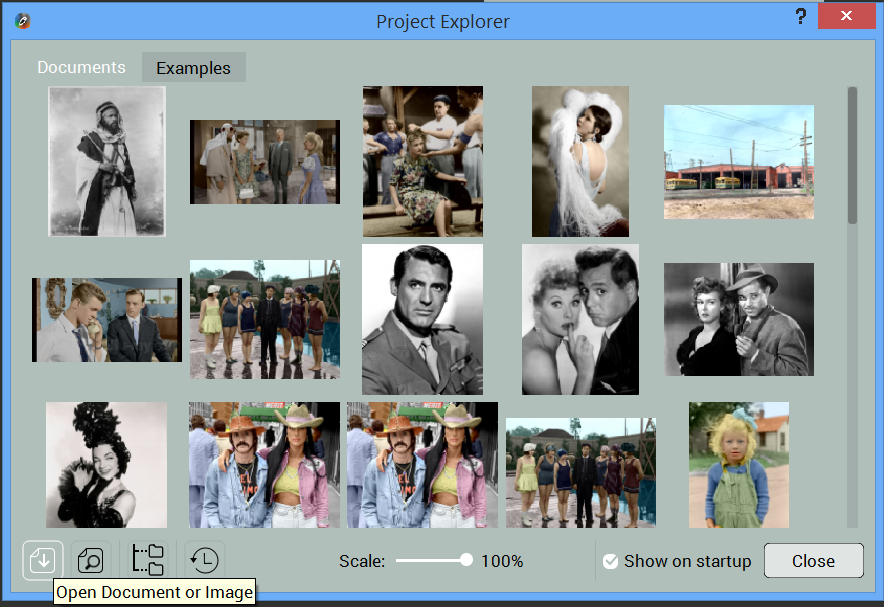
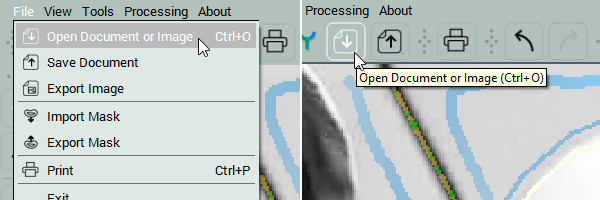
Open Document or Image
CODIJY lets you open CODIJY document (MGD file) or image in one of the supported file formats e.g. PNG, JPG or TIFF.
Option 1. Clicking the Open Document or Image icon in the Project Explorer.
Option 3. Navigate to File -> Open Document or Image.
Option 4. Click the Open Document or Image button on the toolbar.
Save CODIJY Document
Note: We strongly recommend saving your image to the CODIJY Document (MGD), before you start working on the new colorization. Starting from version 3.7., CODIJY automatically saves your work to the CODIJY document, once you have created the MGD file for it!
Trial Users: Saving your work to CODIJY document in the trial version let you open it in the registered version to generate the watermark-free results.
To save your work to CODIJY Document (MGD):
Option 1. Press Ctrl+O (Windows) / Command +O (Mac) Option 2. Navigate to File -> Save Document. Option 3. Click Save Document icon on the toolbar.
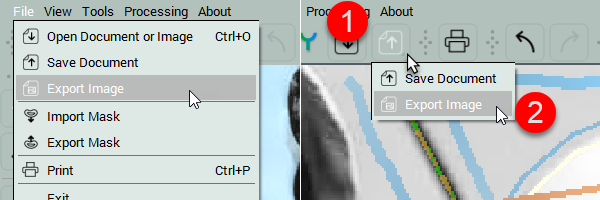
Export Preview of Result to the Image
After the program has generated the Result Preview, you can export it to any of the supported image formats. To export the Preview to the image:
Option 1. Navigate to File -> Export Image Option 2.
Click Save Document button
Hold the mouse button down for 2-4 seconds. The menu with Export Image item will drop down.
Project Explorer
Project Explorer helps quickly locate recent CODIJY documents (MGD) under Documents tab and provides access to the pack of colorized and B&W training examples located under the Examples tab.
By defualt, the Project Explorer opens when you launch CODIJY.
You can open Project Explorer any time by clicking the Open Project Explorer icon or by navigating to View ->Project Explorer.
You can also search, look up CODIJY Documents by folders, sort them by date and scale Result Previews for ultimate convenience!
Drawing Modes: Freehand & Line work with all Pen tools and Eraser
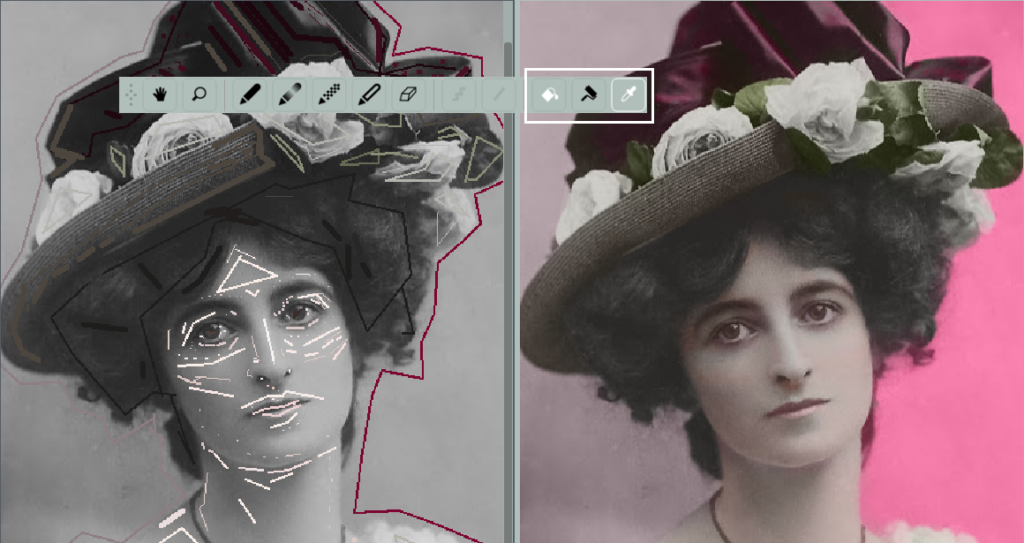
Repaint Tools: Repaint, HSB Repaint, Color Picker Tool
Top Toolbars
Other major toolbars are:
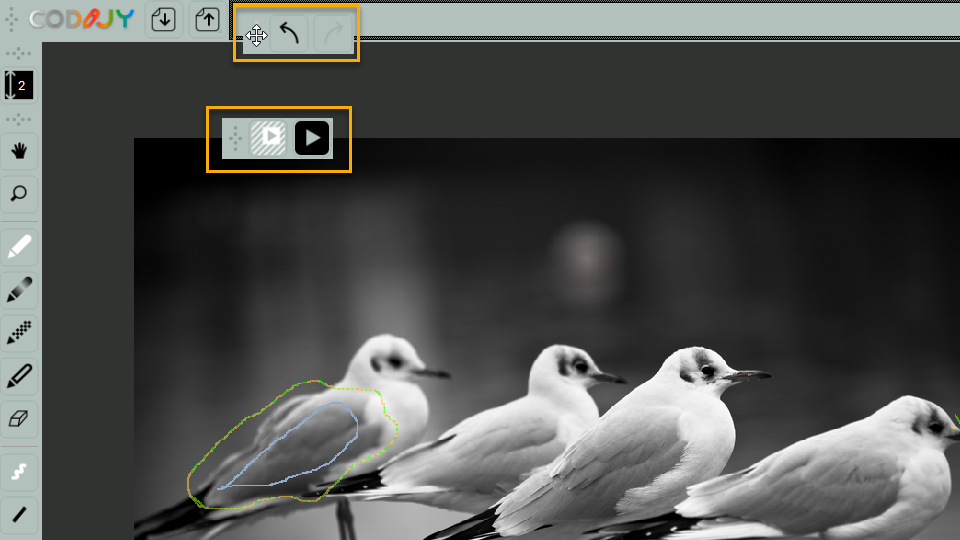
File toolbar: Open, Save Document / Export Image
Undo / Redo Toolbar
Masks: Normal & Overlay Masks
Import / Export Masks to *CMSK files (Pro Edition Only)
Brush size toolbar – sets size for Pens and Eraser Brushes
Actions – Process Image /Partial Processing
Additional toolbars offer access to Project Explorer, Document Info, Printing, Registration etc.
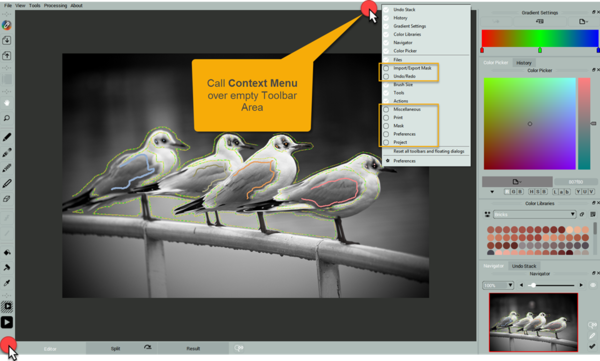
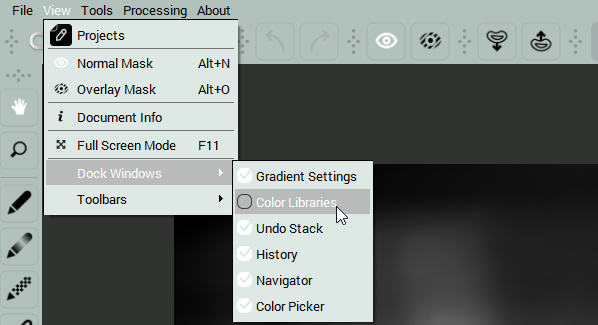
Enable Missing Toolbars & Dock Windows
You can enable disabled toolbars and Dock Windows, from the Context or Main Menus.
Option 1. Right click (Win) / Cmd + Click (Mac) over empty toolbar area to call Context Menu.
Option 2. Go to View -> Toolbars (Dock Windows)
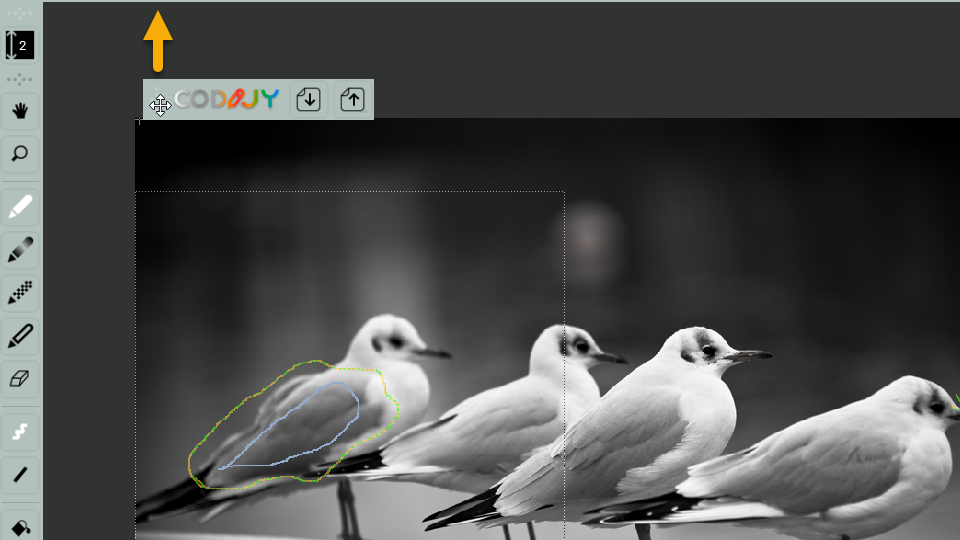
Reposition Toolbars
You can change position of the toolbars and dock windows by dragging and dropping them over to the new position.
Step 1. Click the toolbar handle and drag it over the work area.
Step 2. Move the toolber to a new location on the toolbar area (e.g. top or left-side toolbar area)
Step 3. Once the frame displaying the potential position shows up, release the mouse button. The toolbar will snap to it. NOTE: If you drop the toolbar, before the frame shows up, it will remain floating over the working area.
To fit a single column, the Dock Windows are hidden under the tabs .
Reposition Dock Windows
To change the order of the dock windows:
Step 1. Click and hold the Window header Step 2. Drag the window over the window area, until the black frame shows up. Step 3. Release the mouse button. The window will snap to its new position.
Alternatively, drop it over the working area to keep it at hand.
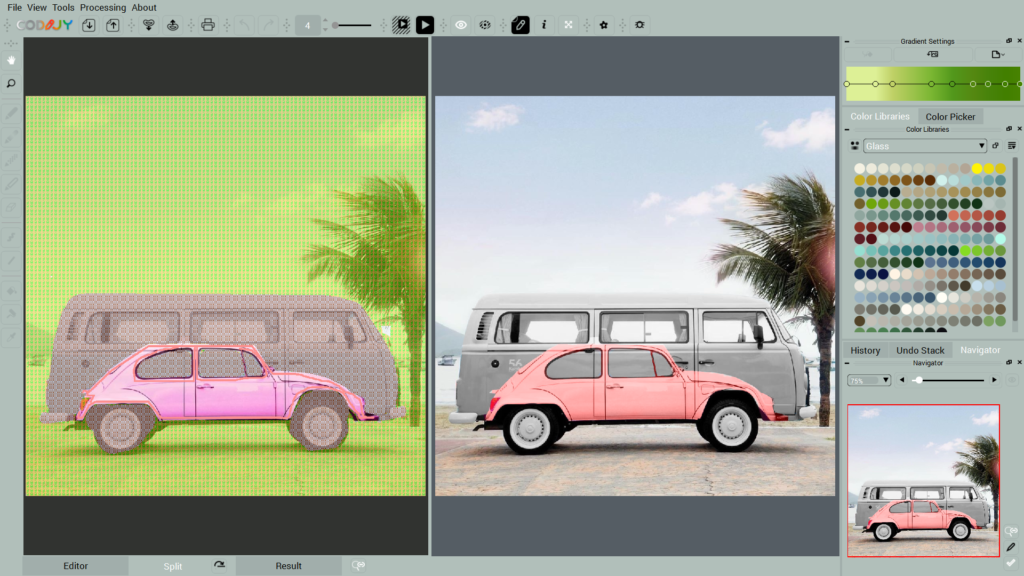
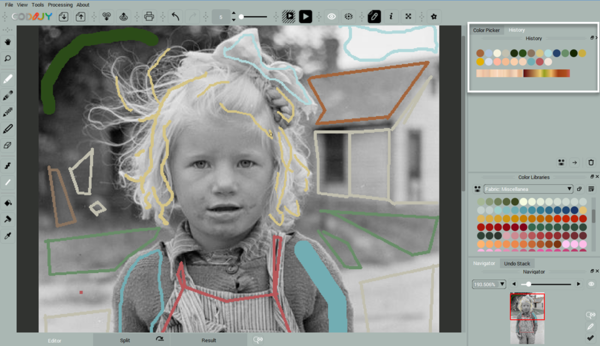
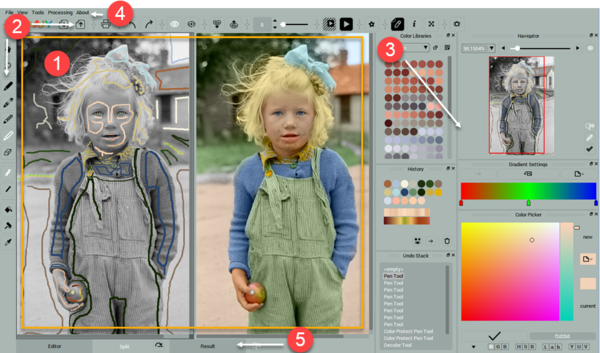
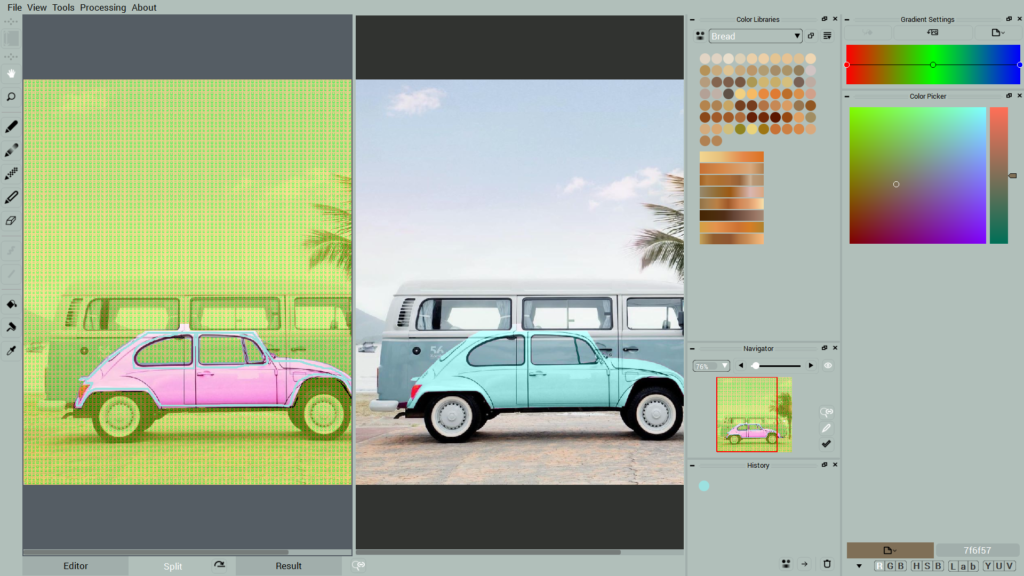
CODIJY interface offers a convenient workspace for easy manipulation of photo colors. All its tools and features are at hand.
Top and left-side areas (2) host toolbars . The right side area (3) docks float windows. You can reposition toolbars and windows in these areas.
Main menu (4) gives access to File, View, Tools and Processing operations.
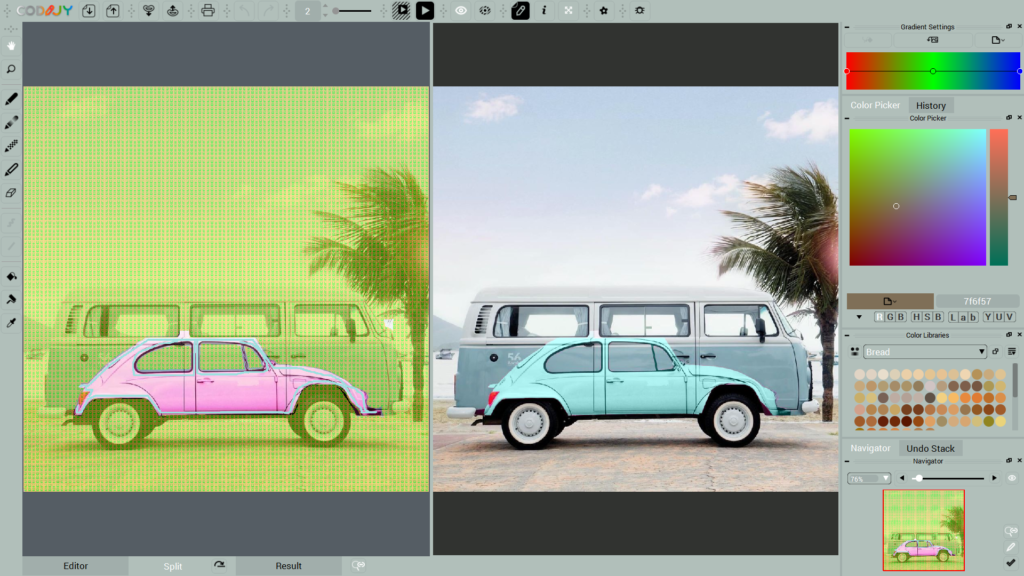
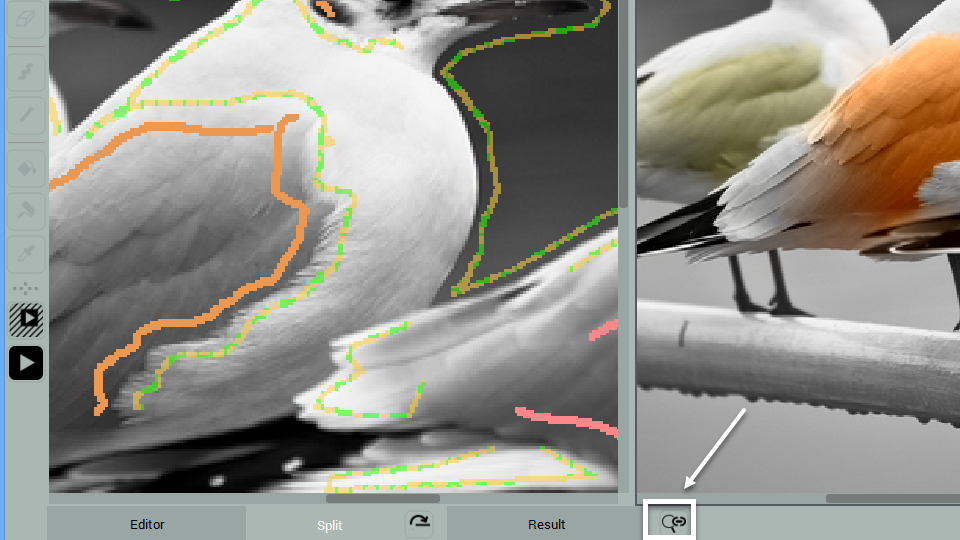
Tabs (5) located at the bottom of the Work Area (1) let you switch between Editor, Result and SplitViews.
Editor– the canvas that displays original image, where you are supposed to draw color masks.
Result – preview of the resulting image generated after the program processes your work. Note: If you do not add any masks, CODIJY will generate the grayscale preview of both monochrome and color images.
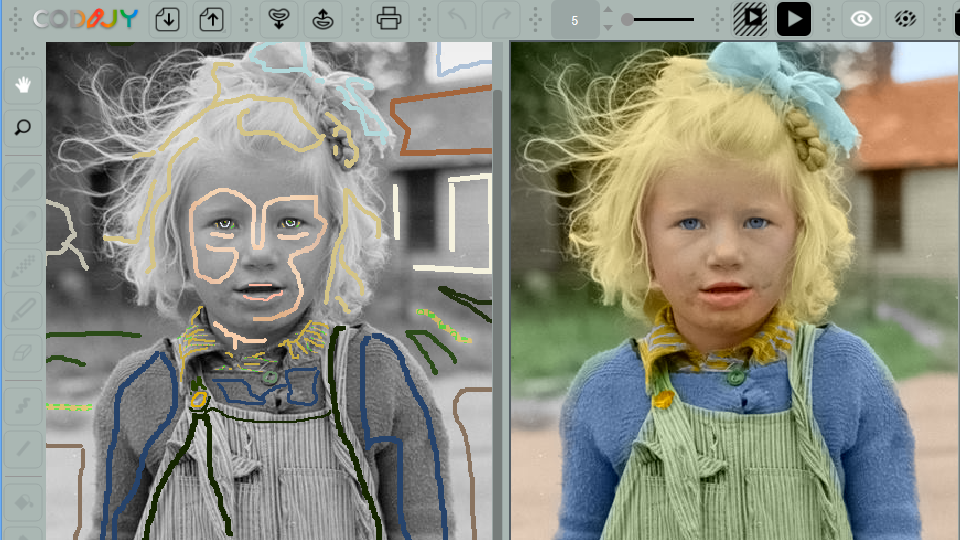
Split View – displays Editor and Result side by side. You may change between portrait to landscape orientation of Split view.
NOTE: Editing tools will grey out, when the Result Pane is active in the Split View. To enable them, just click over pane with the Editor.
Why my screen layout looks different than on screenshots?
CODIJY interface may look differently, because the program picks different layouts for higher and lower screen resolutions. If you don’t see the main menu, miss some toolbars or dock windows, please change layout or enable missing elements manually.
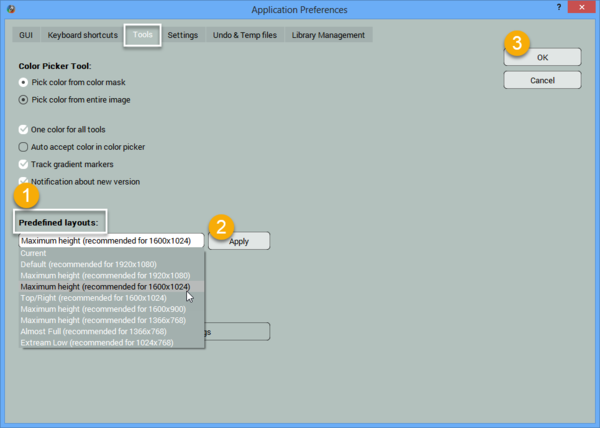
Layouts
To make all critical elements fit onto screens with lower resolution, CODIJY offers 8 predefined layouts. When you install CODIJY, it identifies the screen resolution and sets the matching layout.
Note: Location of toolbars and dock windows in each layout may vary. Some interface elements may get disabled to make the work area fit your screen.
To change a layout, open Preferences and open Tools tab.
Step 1. Select a new layout under the Predefined Layouts. Step 2. Click Apply – the new layout will get applied and let you preview it. Step 3. Click OK, if you wish to keep the selected layout.
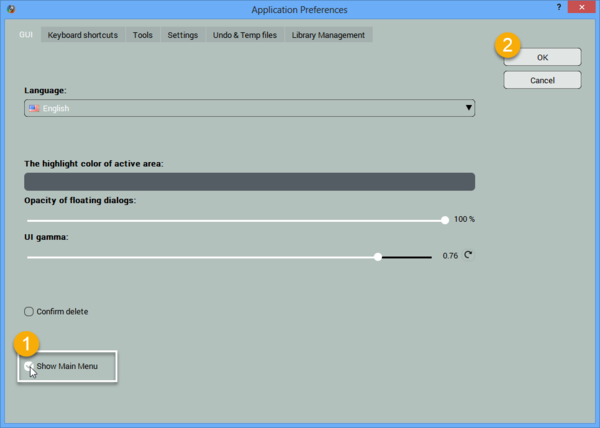
Enable Main Menu
Some interface layouts may come with disabled main menu. You can enable the main menu in Preferences, under the GUI tab.
Step 1. Tick Show Main Menu box. Step 2. Click OK
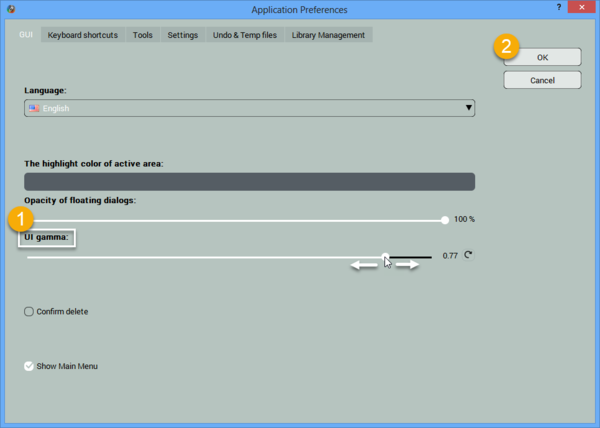
Adjust Interface Brightness
CODIJY interface is best viewed in two color schemes – the bright one and the dark one. You can adjust skin brightness to the comfortable level in Preferences, under the GUI Tab.
Enable/Disable Scaling/Navigation Synchronization Between Views
You can disable synchronization of the Scale/Navigation between the Editor and the Result at the bottom of the work area, next to the View Tabs. It will let you zoom and navigate the images in each of the views independently.